Pocket milling of letters was previously done with the letter milling operation, but it is now done using the normal Pocket Milling operation. This has been done in order to take advantage of the greater control that the pocket milling operation offers. The rest of this tutorial will show you how this is done.
1. Return to the drawing by clicking the tab Untitled Drawing (or the name of your drawing if you have saved the drawing).
2. Sselect the feature Pocket Milling by clicking on the icon ![]() Pocket Milling in the Milling Operations toolbar to generate a CNC-toolpath for pocket milling.
Pocket Milling in the Milling Operations toolbar to generate a CNC-toolpath for pocket milling.
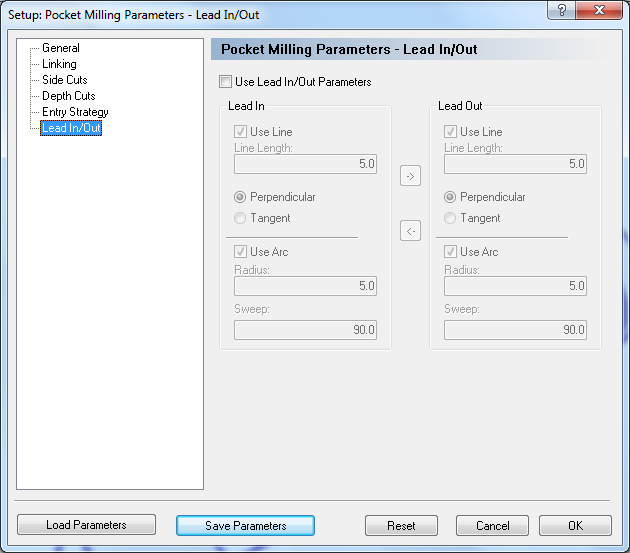
3. Click on the button Parameters.
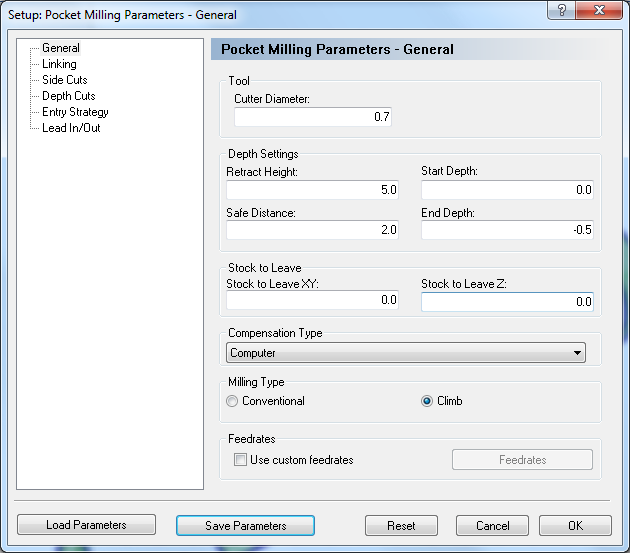
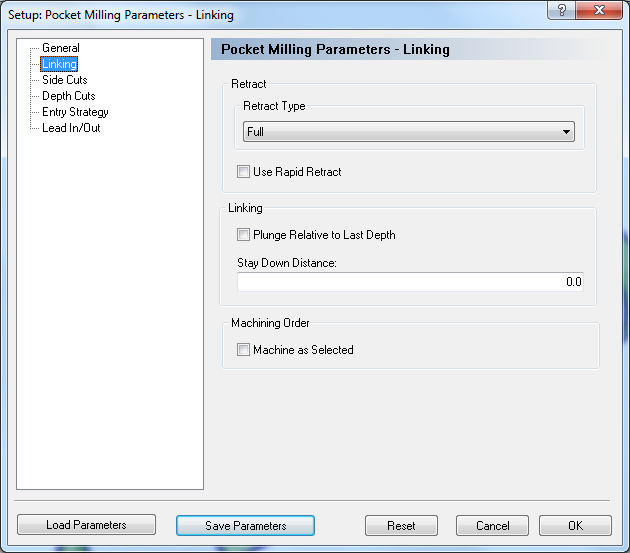
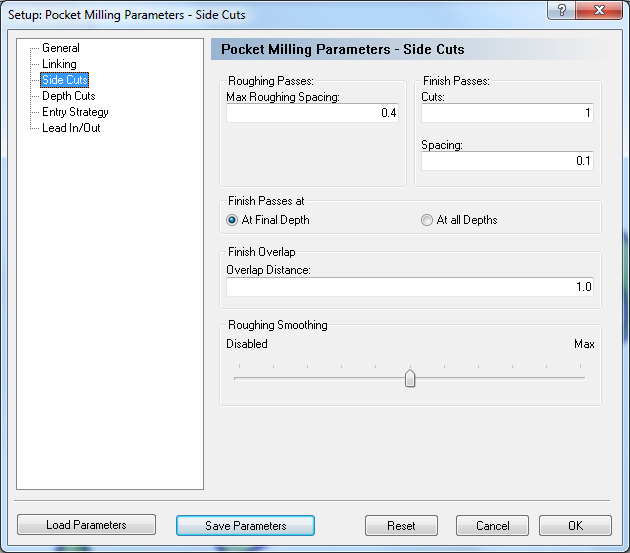
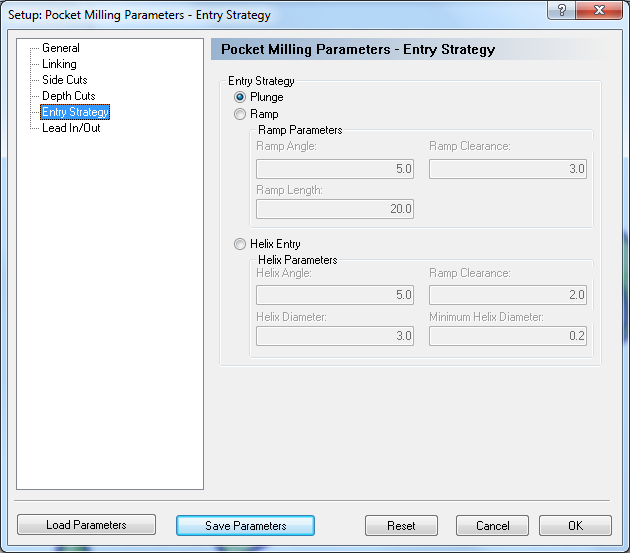
4. Insert the new parameters in the parameter pages as shown below (We will not describe the parameters in greater detail, since they are explained in Tutorial Mill 2 - Machining the part ).
 |
 |
 |
 |
 |
 |
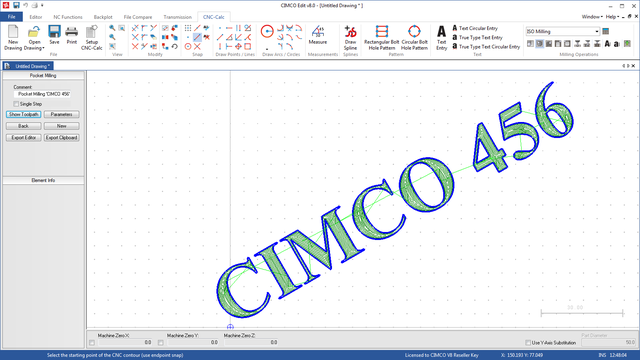
5. Select each of the individual letters in the text.
6. Click on Show Toolpath - the generated toolpaths will now be shown on the screen.
 |
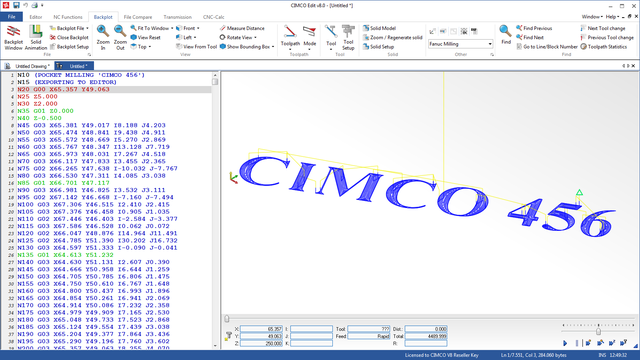
7. Click the button Export Editor. Now the NC codes for the machining are shown in the editor.
8. Simulate the program to verify the toolpath the same way we did earlier in this tutorial.
 |
The example program "CIMCO 456" can be used as a subprogram to another program by simply cut-and-paste, but can also be completed as an independent program, providing it is supplied with the code lines for Program Start / Program Stop, Tool Change, and Feed/Speed, which you can quickly add either manually or using the Macro function in CIMCO Edit V8.