|
Please ensure that Single Step isn't checked in the left hand pane of the window. |
In order to define the machined areas some selections must be made:
|
Please ensure that Single Step isn't checked in the left hand pane of the window. |
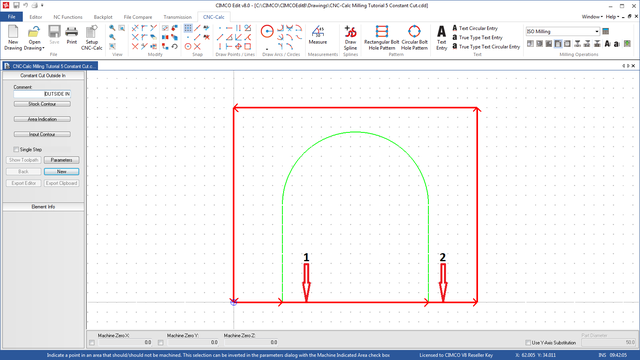
Select the stock contour by left clicking on the contour first where indicated by number 1 and then where it is indicated by number 2 (see picture below). Please make sure that the arrows point in a counterclockwise direction around the part.
After the selection has been made the following window should be displayed (minus the text and arrows):
 |
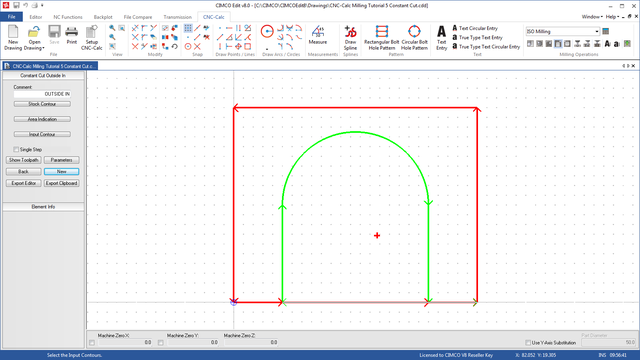
Now the machined point should be indicated. Click at the point indicated by the red cross on the picture below. The area indicated by this point will be machined up to internal boundaries and from the stock contour.
|
Every time an internal boundary is crossed the status will toggle between machined and not machined. |
After the indication has been made the following window should be displayed:
 |
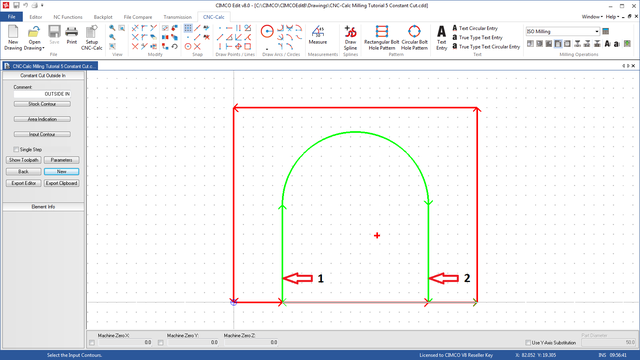
The last thing to do is to select the internal contours. These are the boundaries between machined and not machined areas of the part. The direction of the contour is not important but select it as indicated by the number 1 as here or as indicated by the number 2.
Please do not close the contour but leave it open at the stock contour.
After the contour has been selected the following window should be displayed:
 |
Now all the selections are made and we can take a look at the parameters.