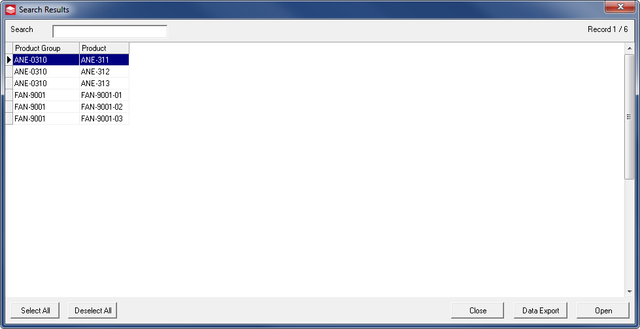
The Search Panel is positioned in the left side of the Explorer. Fill out any or all of the fields available according to your search requirements and click the Search button. If there is more than one match for the search criteria on a sub-level, clicking the Results icon will open the "Search Results" window, showing all the coincidences found. You can open them in the Explorer View by double-clicking or selecting the desired items and click on Open. You can filter the search results by performing a local search in the Result window using the search field at the top. The search results can be exported to an Excel file by clicking the Data Export button. You can open again the Search results window and navigate through the items using the Results icon ![]() in the Database toolbar. Click the Delete button to clear all the search fields.
in the Database toolbar. Click the Delete button to clear all the search fields.
 |
|
The Search Results window. |
The available search fields in the Search Panel can be customized in the Database Configuration dialog, under Client Configuration -> Search Fields.
The Advanced Search check box at the bottom shows the Date fields for searching by dates or time periods.
The Explorer View is positioned in the top-right side of the Explorer. The first column in the Explorer View shows your root-level entries. By default these are called Projects (or Product Group, Customer, etc. according to your database structure) and can be expanded by clicking the small (+) icon next to a project name. This reveals any sub-level documents and these can again have sub-level documents beneath them. There is no limit as to how many levels can exist.
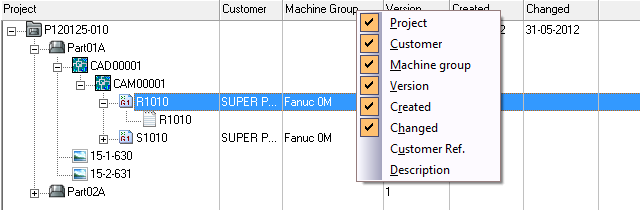
The Explorer View also contains a number of additional columns with details for the documents in the first column, e.g. Customer name, Machine group, Changed date, etc. The columns shown can be configured in the Database Configuration dialog (under Database Configuration -> Show Columns), and added to the Explorer View by right-clicking in the columns title bar and selecting the columns you want to display. To sort the columns, drag and drop in the desired position.
 |
|
Selecting columns to show. |
Double-clicking a level in the Explorer View brings up a dialog with the information and database fields for that level. Double-clicking a document opens it in an external program, e.g NC-programs open in CIMCO Edit while CAM files open in Mastercam - this is completely configurable.
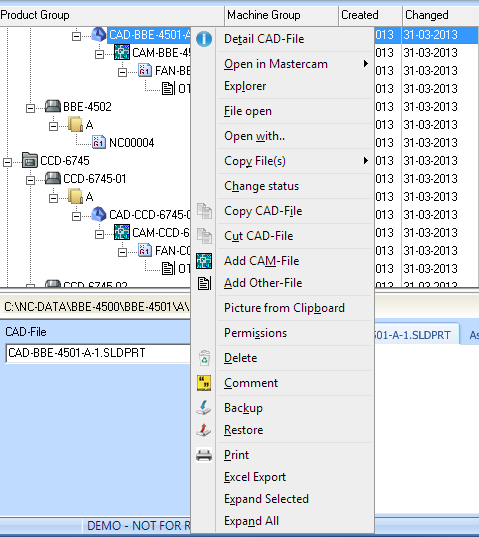
Right-clicking a document in the Explorer View brings up a contextual menu with relevant functions for that document. Many of the functions in the contextual menu have already been explained in the section Menus and Toolbars.
 |
|
Right-click menu in the Explorer View. |
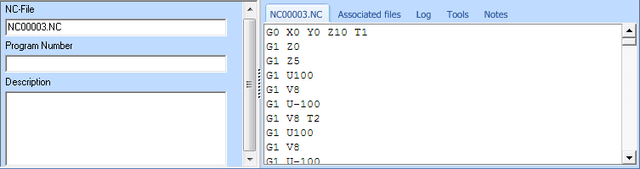
The Database Preview is positioned in the bottom-right side of the Explorer. It provides a dynamic preview of the selected level or document in the Explorer View. The amount of information shown depends on the selected level or document. The left side of the Database Preview shows the related database fields and information. Depending on the item selected in the Explorer View, the right side of the Database Preview will contain several tabs. For example a preview tab which show a preview of the contents of the selected document, an Associated files tab that provide an overview of documents associated with the selected document (documents in sub-levels), a Log tab with history tracking of changes to the particular document, and a Notes tab which shows the comments entered for the corresponding document/level.
 |
|
The Database Preview panel. |