Use this dialog to configure the different levels - their names, icons, how they are related, and where they are stored.
 |
|
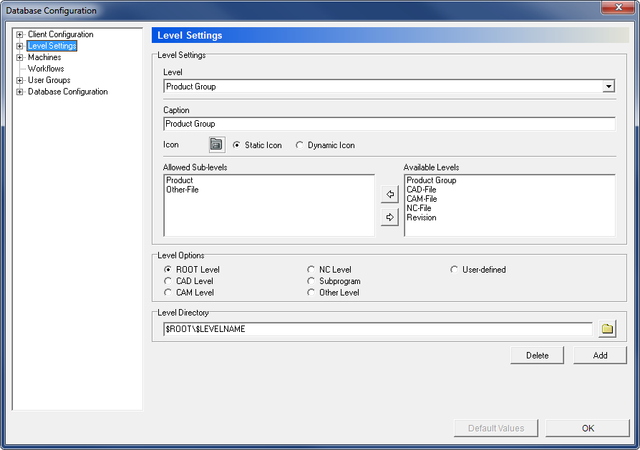
The Level Settings dialog. |
Use this drop-down list to select the level to be configured.
To add new levels to the list, click the Add button at the bottom of the dialog. Enter a name for the level and define its settings using the fields below.
Click on Delete at the bottom of the dialog to remove the selected level.
Use this field to enter/edit the name of the level.
This is the icon shown in the Explorer view for the selected level. Click on the icon to select a new one from file.
Toggles between using the icon selected to the left (Static icon), or using the predefined Windows icon for the file type (Dynamic icon).
This field shows a list of the sub-levels assigned to this level. Use the arrows ![]()
![]() to add or remove sub-levels from the field Available Levels.
to add or remove sub-levels from the field Available Levels.
This field shows a list of the available levels that can be assigned to the Allowed Sub-levels group. Use the arrows ![]()
![]() to add or remove sub-levels to the field Allowed Sub-levels.
to add or remove sub-levels to the field Allowed Sub-levels.
Use the options of this section to define the level type that will be applied to the selected level.
Use this field to enter the path for storing the level data. Variables ($ROOT, $LEVELNAME, $PARENTLEVEL, etc.) can be used for relative directioning, or an absolute placement can be browsed by clicking the folder icon ![]() .
.
If the option Prefer Machine Directories is checked in the dialog Level Options - which will use the directories configured in the machine configuration -, this field will be disabled (grayed).