 |
|
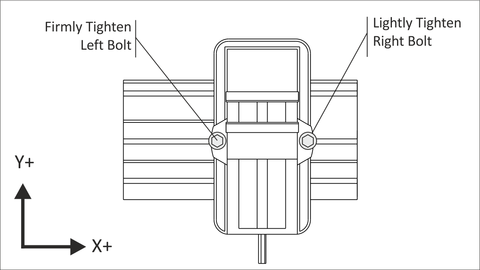
Figure A.1: Pre Tighten Bolts |
Before using a vise it must be aligned with the machine X-axis. This is a good practice before starting any new job to check vise alignment to ensure it is parallel to the machine axis.
Jog the spindle out of the way and remove any tool to prevent accidentally bumping into it while working.
Clean the machine table and bottom of vise to ensure there are no chips or debris between the table and vise.
Locate the vise where all features on the part can be reached by the tool without exceeding the machine travel limits. Include overrun for lead in/out moves.
Before installing bolts, jog the machine to ensure the vise cannot contact any machine sheet metal throughout its travel.
Insert bolts in T-slots.
Firmly tighten the left bolt. This bolt will act as a pivot for the vise to rotate about during alignment. Lightly tighten the right bolt.
|
|
Figure A.1: Pre Tighten Bolts |
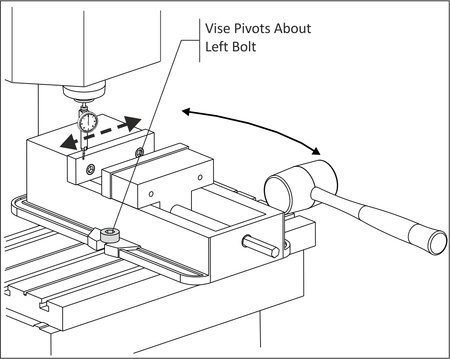
Install a dial indicator. Jog the machine until the dial stylus is along the fixed vise jaw. Jog the machine left to right along the vise jaw. Lightly tap the vise with a rubber mallet, causing it to rotate about the left bolt, until the indicator remains stable.
 |
|
Figure A.2: Align Vise |
Tighten the right bolt fully, and then tighten the left bolt. Recheck the alignment by running the dial indicator along the fixed vise jaw and confirm the dial does not move more than .001 inches over the full width of the jaw.